01/30/16

Using AiM speed sensors for alarms with Arduino

So if you’ve been reading my blog, you know I created a SV650 ECU Decoder which decodes the data stream from the ECU that normally would go to the OEM dash. Recently I upgraded from the GPX Pro to the more powerful and physically bigger AiM MXL2.

So here’s the problem- the new dash is bigger which means I’m having a harder time finding a visible mounting point for my ECU decoder. And while the MXL2 can decode things like water temp, TPS and gear position from the ECU, it can’t decode any EFI warning codes. I didn’t like the prospect of not knowing when the bike was misbehaving due to a bad sensor or damaged wiring harness so I needed to come up with a solution. Continue reading

01/19/16

Initial AiM MXL2 Review

After comparing AiM, Race-Technology, MoTeC, AEM, RaceCapture/Pro, GEMS, XT Racing, TraqMate, VBox and 2D data logger offerings, I decided to go with the AiM MXL2 for my race bike to replace my XT Racing GPX Pro.

There’s a number of reasons for choosing AiM and their MXL2 over the others, but here’s the short version:

  • Software. After using the XT Racing GPX Pro for five years I learned how the hardware is only half of the equation. It doesn’t matter how much data you collect if you can’t display that data as actionable information.
  • Support. Many of these companies don’t have any support here in the USA and their support suffers. Even when the company is native English speaking it can take weeks for them to answer even basic questions about their product. AiM often responds in less then 24 hours!
  • Pricing. Some companies seem a lot less expensive then AiM until you realize they start charging you extra for critical features that AiM includes by default. That and AiM never charges for software/firmware updates for the life of the product can mean saving hundreds of dollars over the lifetime of the unit.
  • Features. The MXL2 is the latest generation hardware from AiM and it has many features that other high-end vendors like MoTeC and 2D charge thousands of dollars more for.
  • Ease of Use. Data logging in motorsports has been going on for nearly two decades and many vendors have software which look like it would be more at home running under Windows 95 rather then a modern operating system. AiM is in the process of rewriting their Race Studio Analysis software to take advantage of modern UI design.
  • Education. AiM is the only vendor I could find that not only has a lot of Youtube videos explaining how to use their software, but also offer inexpensive classes around the country. I just finished two days worth of classes (cost me $80) and learned not only a lot about AiM’s products and software, but also a lot about how to analyze the data which isn’t really obvious when you’re first starting out.
  • Quality. Once you look at the wiring harness connectors on the MXL2 you know this is a serious piece of equipment. The dash is billet aluminum and the buttons are solid. Everything about it exudes quality. Actually, the dash is so solid that I decided to re-enforce the front fairing stay on my motorcycle to make sure it could handle the extra weight!

There are some risks though- AiM while very big in the automotive club racing scene it has a very small (but growing) presence in motorcycles. The good news is that there are very few features that are specific to cars or bikes, so whatever enhancements are added over time should carry over. That said, the factory MotoAmerica Yamaha Team is also using the MXL2 so I’m sure the bikes won’t be ignored completely.

12/11/15

Quick thoughts about Let’s Encrypt

So I just switched over from StartSSL to Let’s Encrypt for all of Syn Fin dot Net’s SSL needs and wanted to give a few thoughts about the process:

It’s a very different experience getting up and started. I’ve used a variety of SSL CA’s for work and personal use and Let’s Encrypt is the first I’ve seen to so fully automate things. This has some pros and cons, but overall it’s much quicker and easier to get up and running with Let’s Encrypt then StartSSL (which honestly isn’t saying much) or most other CA’s. The downside of this is that the process is so different that you actually have to read the docs rather then just following the prompts, but having to RTFM is a small price to pay for a free SSL cert IMHO.

Let’s Encrypt (just LE for short) is also the first CA that limits their certs to 90 days. They claim that 90 day certs are becoming more common, but none of the CA’s I’ve ever used in the past even offer that as an option. Kinda annoying, but not a deal breaker considering how automated renewing certs are.

LE only offers domain validated certs (ie: no extended validation) which is fine for personal use, but it’s a little odd that there’s no requirement for any ownership information other then an email for contact purposes. For some use cases this makes a lot of sense, but I’d actually like people to know I own this domain (as long as they don’t spam/junk mail me).

LE’s automation makes it easy to get up and running quickly- if your needs adhere to their tool’s limitations. I ended up having to tell Nginx to serve up http://mail.synfin.net so I could get an SSL cert for Postfix. Lucky for me, my mail & web server are the same box so this was easy, but for most organizations this becomes a real pain.

My biggest feature request right now would allow the the letsencrypt-auto script listen on arbitrary ports and not just TCP/80 and TCP/443 to make it even easier to setup.

11/23/14

TeensyDSC – it works!

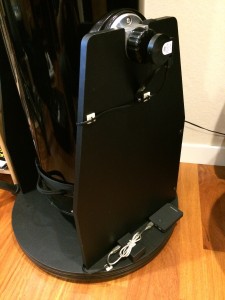
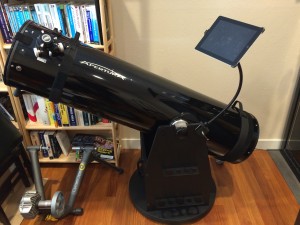
So last night I was finally able to test my custom digital setting circles setup on my AD12… it worked great!  I used the Astrosystems 10K encoder kit with the TeensyDSC and SkySafari on my iPad.  Here’s the photos of my setup:

My Digital Settings Circles setup using SkySafari on the iPad

My Digital Settings Circles setup using SkySafari on the iPad

Alt encoder and Wireless DSC module powered by a USB battery pack

Alt encoder and Wireless DSC module powered by a USB battery pack


11/17/14

A working basic TeensyDSC board

I recently got my first generation PCB in the mail from OshPark and I’m happy to say that the board works just like I had planned! I was able to do some basic testing using 10,000 step encoders, but due to the power of the Teensy 3.1 board and being able to use interrupt driven decoding there shouldn’t be any problem handling 100,000 step encoders if you so desired. The good news is that the board did a great job of reporting the position of the encoders to Sky Safari Pro running on my iPad via a wireless WiFi connection!

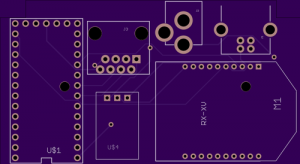
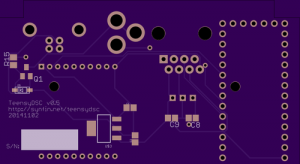
Renderings of the board I actually ended up using:

teensydsc-top-v0.5

teensydsc-bottom-v0.5

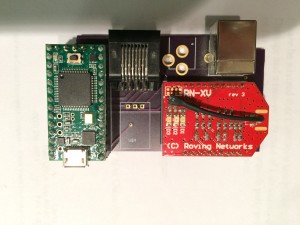
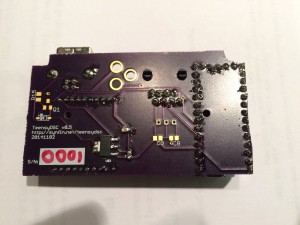
Photos of the board with the necessary components installed:

TeensyDSC Simple (populated) Top

TeensyDSC Simple (populated) Bottom

Notice there are some missing parts on the PCB.  That’s because so far I’ve only soldered on the parts necessary to power it via USB.  The missing parts are for powering it via 12V DC.

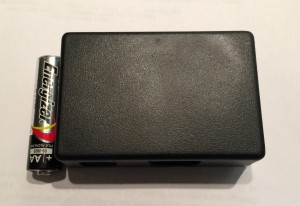
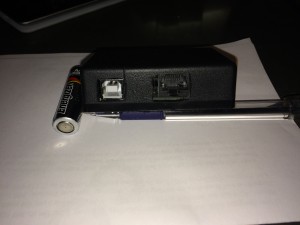
It also fits nicely in this small plastic enclosure I have:

2014-11-17 21.50.29

2014-11-17 21.48.12

As you can see, this board is smaller and much simpler then the earlier board I designed. I did this because it wasn’t going to be possible to fit the original board in the small plastic enclosure I had picked out and most of the features I wasn’t actually going to use/need and I wanted to focus on getting the basic DSC features tested and working.

05/21/14

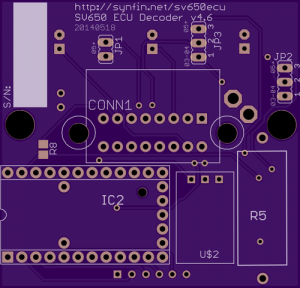
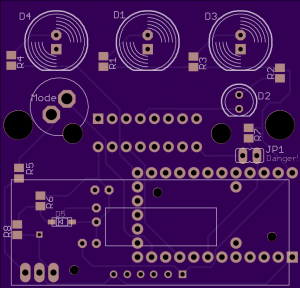
SV650 ECU Decoder v4.6 Design Finished

So I just ordered a few new boards from OshPark:

Front

Back

This was a major update which fixes all know bugs (many which are severe) and improves the protection of the circuit.

  • Switch to Murata 5V switching regulator.
  • LM7805 was overheating with heavy use of LED display in latest code
  • Add power MOSFET for reverse polarity protection
  • Add TVS diode for power/spike protection
  • Fix fuel/very low fuel indicator for 03-04 and 05+
  • Move EFI light off of pin 11 to allow interrupts to work
  • Move Mode switch to an interrupt pin
  • Add ground plane & clean up traces
  • Further improve battery voltage monitoring
  • Capacitors are now SMD too
01/25/14

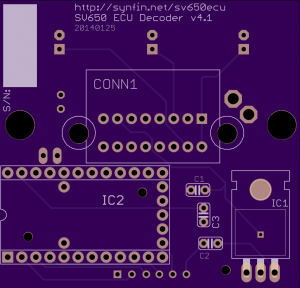
v4.1 board design finished!

I’m happy to announce I’ve finished with the latest design of the SV650 ECU Decoder which has a number of improvements:

  • Add button for switching the display modes
  • Add support for detecting “very low fuel” on 2005-07 models
  • Improve battery voltage measurement circuit
  • Small tweaks to the layout and silkscreen

The board design has been sent to OSH Park for fabrication and hopefully I’ll get them in about 2 weeks.

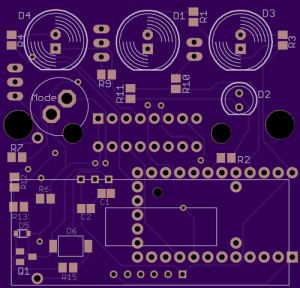
Here’s a rendering of the new PCB design:

v4.1 Top

v4.1 Back

Update: So some testing of this board is showing some problems, including a possible problem which causes the Teensy board to be damaged, so I’m currently suggesting people not use it!

03/25/13

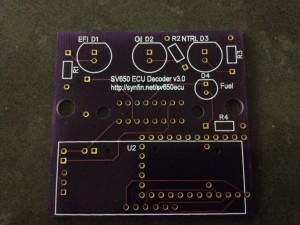
SV650 ECU Decoder Part 4: Third time is the charm?

Part 1 is here.
Part 2 is here.
Part 3 is here.

So my v2.0 boards were a complete dud.  Turns out some how I messed up the design and ended up wiring up the connector to the wiring harness backwards so nothing works.  Wasn’t a complete disaster- I was going to have to do another revision of the board either way, but it does slow things down. Continue reading